Gamification Ups and Downs

Gamification is a fancy word to describe the use of many different types of classroom activities. But what is it really? At its core, gamification in education refers to the use of game-like elements in non-game contexts to enhance learning. Teachers have always strived to find new ways to engage students, but how can teachers ensure that games are used appropriately to meet educational goals both inside and outside their classrooms?

With funds from an Erasmus+ grant awarded to my school, I had the opportunity last month to attend a course in Valencia, Spain on Game-Based Learning and Gamification in the Classroom. Along with teachers from six other European Union countries, including Poland, the Czech Republic, Hungry, Italy, Spain and Slovenia, I spent a week learning about the elements of game design and how to effectively integrate them into our educational framework.

With such a culturally diverse group, it was eye-opening to hear the different approaches teachers had to applying game-based learning in their classrooms. From analog games such as BrainBox, question-of-the-day and escape rooms to digital options such as Kahoot, Minecraft and AI image generation, we covered a wide variety of options. Aside from enjoying lots of tapas and empanadas, I was also able to visit Valencia’s impressive City of Arts and Sciences.

City of Arts and Sciences architecture in Valencia, Spain : Wikipedia

There are so many ways to incorporate games into a differentiated teaching strategy. The benefits are well-known: game-like activities can increase student motivation and engagement, provide real-time feedback, promote teamwork and collaborative learning, and allow adaptability to different types of learners. But teachers must also try to ensure that games are directly tied to learning objectives and that all students, not just the winners, have an enriching experience.

Everybody loves to play games, including my high school science students. In my physics classroom, I incorporate games to make learning more fun and to promote teamwork. I use games to introduce new topics and as a method to review material before quizzes or tests in order to reinforce important concepts and increase student confidence. In my experience gamification is a great way to enhance student learning that provides an immersive method for delivering science content.

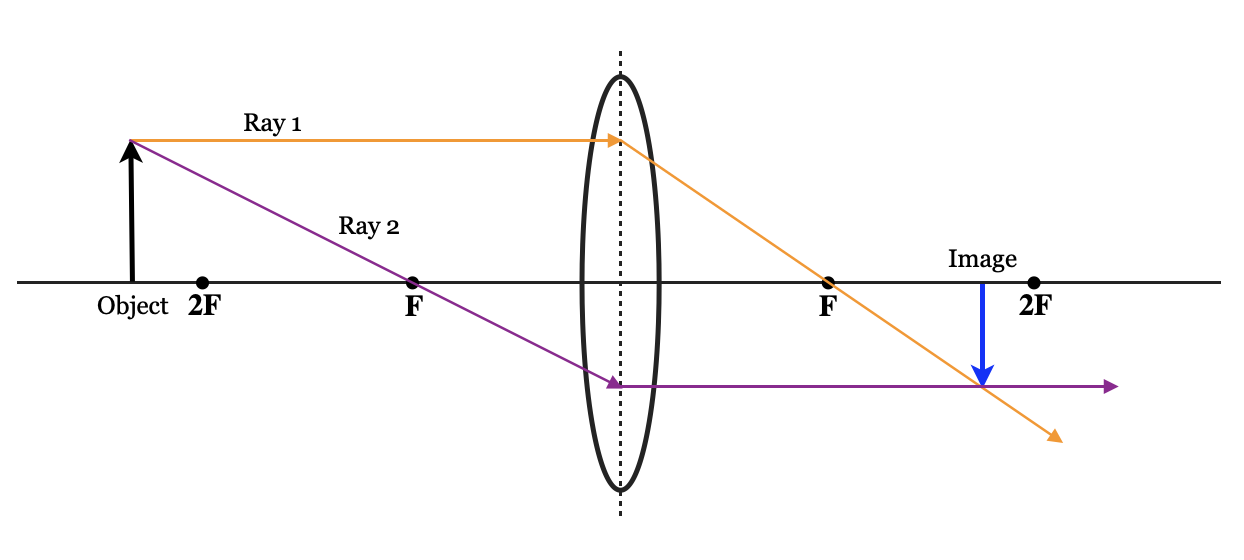
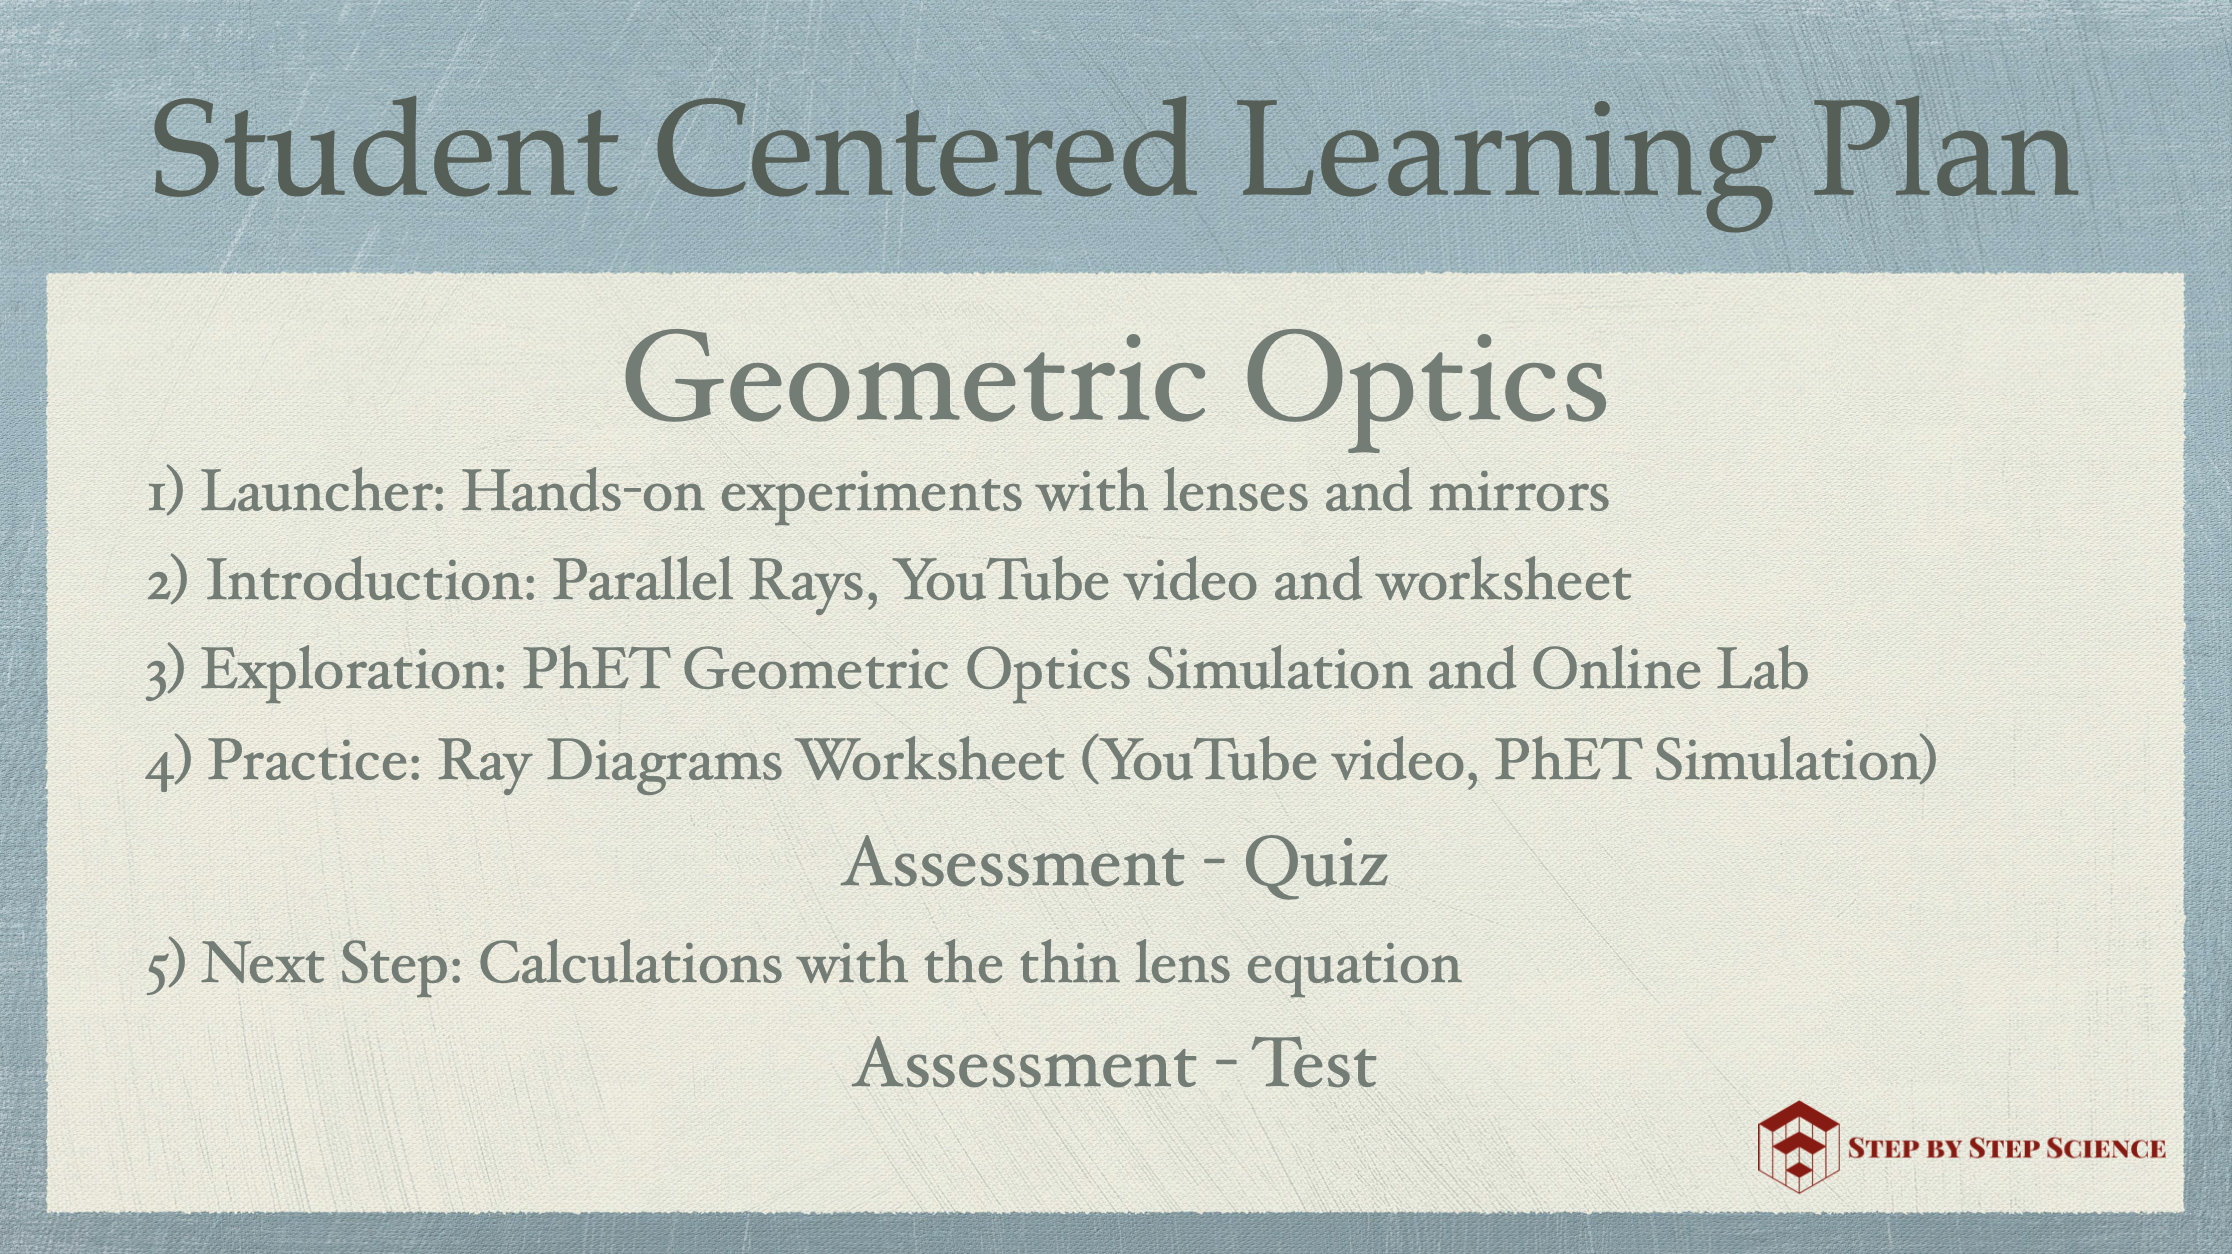
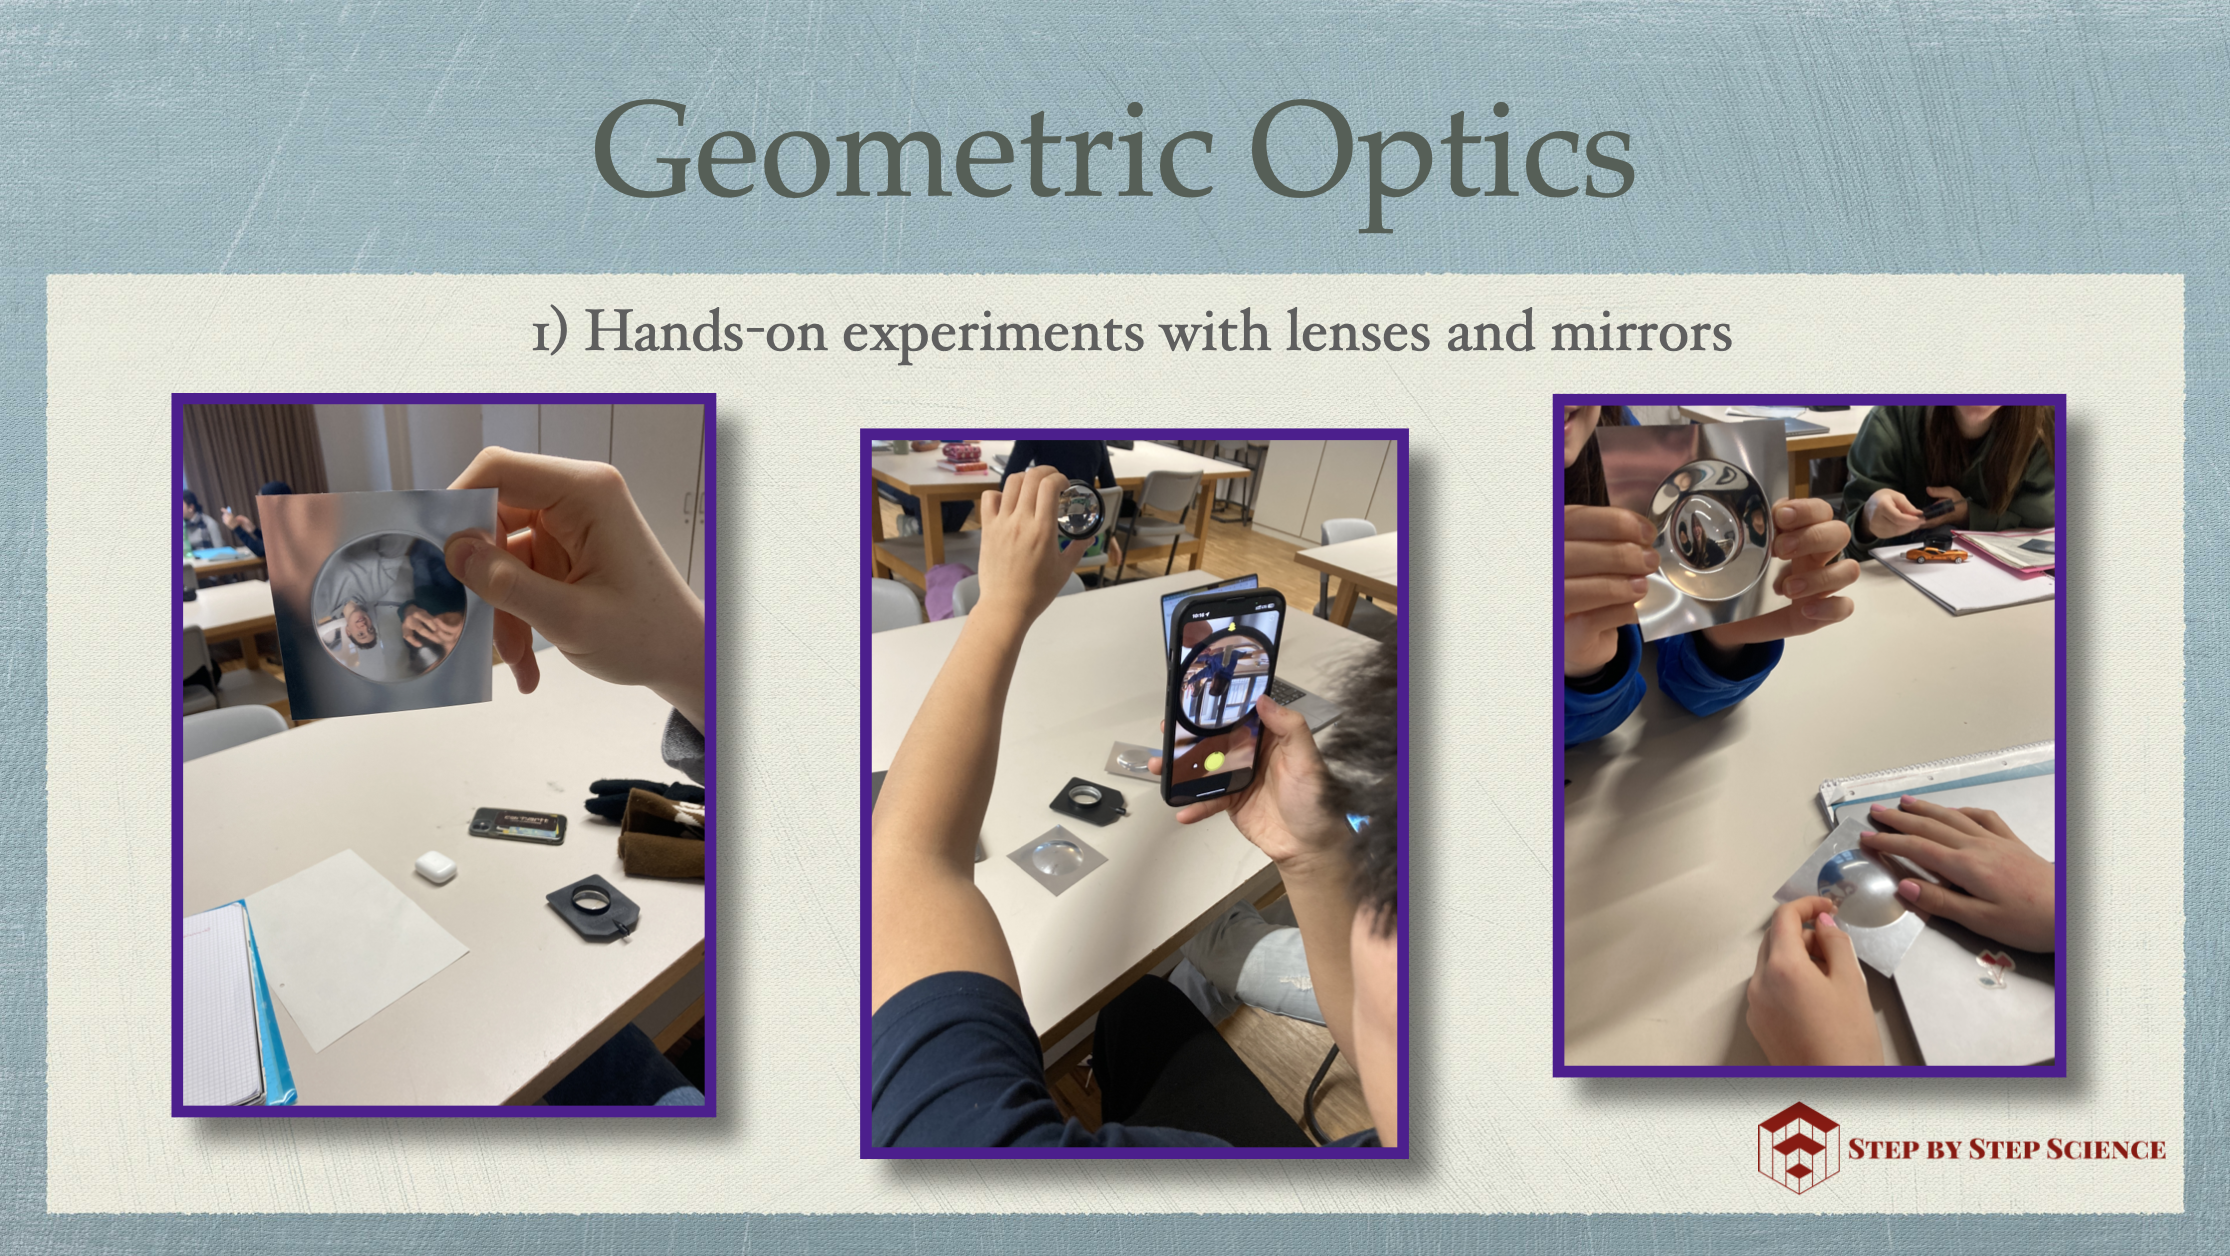
Before our 10th grade lenses and mirrors test, the students play one of my most popular games called Name that Image. With the help of the Geometric Optics simulation from PhET Interactive Simulations, the location of an object is first projected at the front of the room. Students working in small groups must determine the characteristics of the image that will be produced based on whether the light rays have been refracted through a lens or reflected off a mirror. Teams are awarded points based on the accuracy and completeness of their answers. 

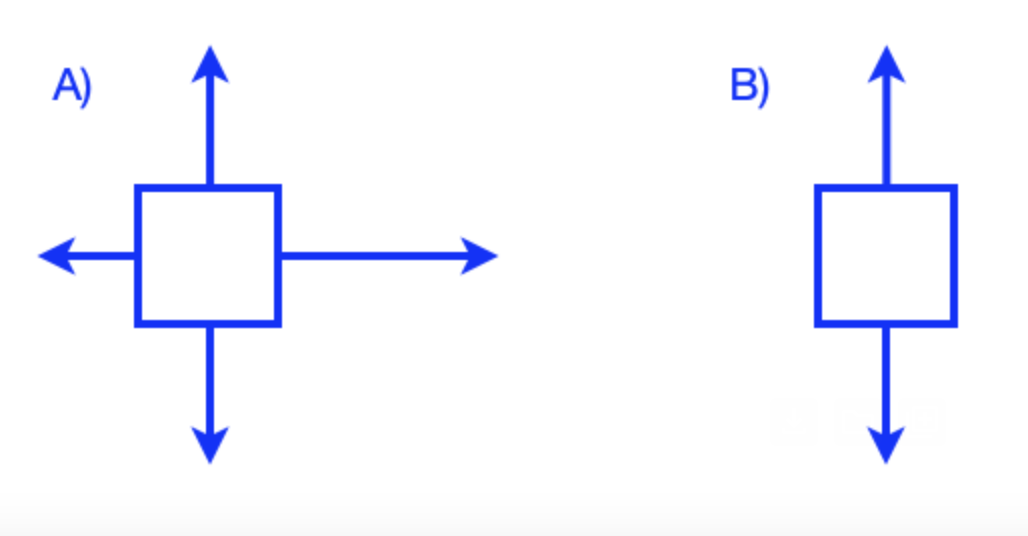
I also like to incorporate non-digital games like matching and sorting cards. For example, in the Motion Graph Matching game, student groups must correctly sort position vs. time, velocity vs. time, and acceleration vs. time graphs to fit the description of a specific motion scenario. It’s fun to wander around the classroom and watch students “argue” about which graphs belong together. This is a great way for them to collaboratively deepen their understanding of motion and graph interpretation.

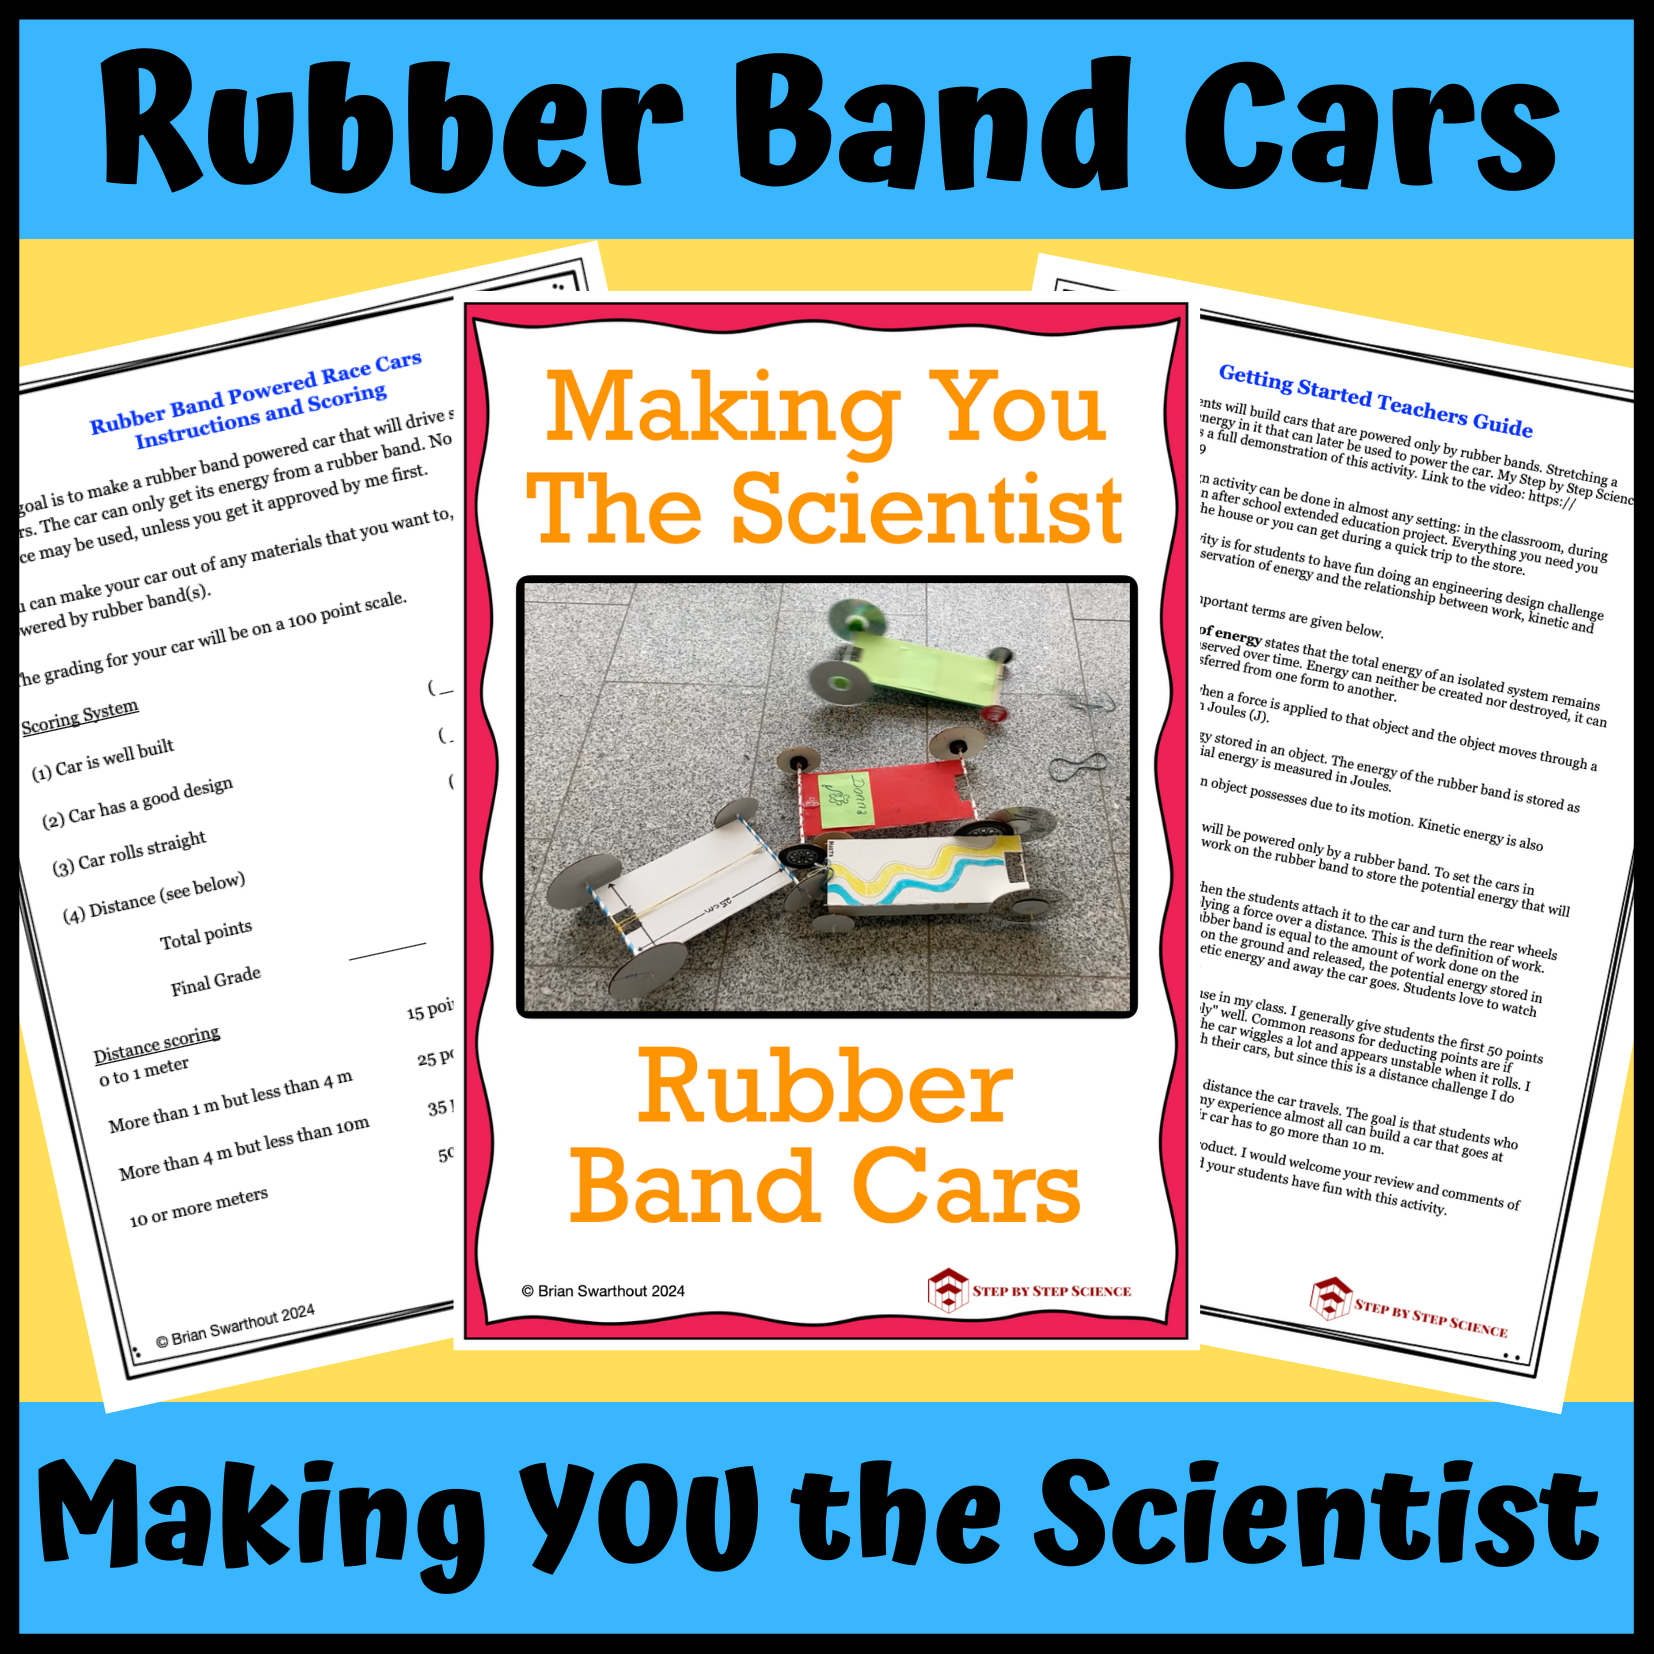
For a more extended and hands-on challenge, I run a rubber band race car project, where students build a vehicle and compete to see whose car travels the farthest. Points are awarded based on specific design criteria and the distance the car travels, adding a competitive edge that motivates them to apply physics principles creatively. Here’s a video that shows how to make a rubber band powered car: https://www.youtube.com/watch?v=YS4YDFMogJo

Whether developing new games or adapting older material to be used in gamifying your instruction, the possibilities are endless. Overall, gamification in my classroom enhances student engagement and makes complex topics more accessible and fun. When games are properly embedded into course learning goals, they have the potential to be a valuable component of almost any educator’s toolbox.

Oscillating Spaghetti

People of all ages love spaghetti, but many people don’t realize that this much beloved food has for years helped scientists to explore deep questions about the universe. Spaghetti science can be used to better understand the properties of matter, the nature of waves, the frequency of vibrations, and elasticity. A recent BBC article reviewed some fascinating spaghetti science experiments such as why you can’t slurp up a strand of spaghetti without getting sauce on your face and why a curved piece of spaghetti that is removed from a pot stays curved when it dries.

The Step by Step Science team also loves spaghetti so we decided to dive into some spaghetti science ourselves. We wanted to explore how different factors affect the period and frequency of a mass oscillating at the end of a piece of spaghetti. We used three different types of spaghetti, three different masses of clay and three different lengths of spaghetti for our experiment.

This hands-on experiment provides a creative connection to real-world situations. By learning about oscillating masses, students gain a deeper understanding of important physics concepts that apply to real life, such as how force, mass, and motion are related through Newton’s laws. Many disciplines of science incorporate an understanding of oscillations. Engineers use these concepts to design buildings and bridges that can withstand earthquakes. Oscillations help clocks keep time and allow smartphones to work with radio waves.

Watch our YouTube video and see if you can identify how each of our three variables — the type of spaghetti, the weight of the mass, and the length of spaghetti – affects the frequency and period of a mass oscillating at the end of the spaghetti.

Our oscillating spaghetti experiment was adapted from the San Francisco Exploratorium Science Snack experiment called Spaghetti Resonance. The Exploratorium has a great collection of Science Snacks that showcase the work of women in math and science. If you’d like to dive deeper into our experiment, you can find all the details and a worksheet to guide your explorations in our TPT store: Oscillating Spaghetti, Making YOU the Scientist. Hope you have fun with your own spaghetti science experiments!

The Beauty of the Periodic Table

I’ve always been enamored of the periodic table. Its logical organization supports understanding of the atomic structure and chemical reactivity of the elements based on where they appear in the table. The periodic table that is commonly used today is based on the original table created by Dmitri Mendeleev in 1869. Mendeleev was the first scientist to notice the patterns in chemical reactivity of certain naturally occurring elements.

Mendeleev’s original table included just 63 elements while today’s table has blossomed to 118. Two of those elements are named after women. Many people know of Marie Curie and her discovery of both radium and polonium. Curie is the only woman to have won two Nobel prizes, one in chemistry and one in physics. You can learn about Marie Curie’s profound impact as a mentor for women in science in a new biography that I highly recommend, The Elements of Marie Curie: How the Glow of Radium Lit a Path for Women in Science.

Fewer people know of Lise Meitner, who discovered nuclear fission. Meitner never won a Nobel Prize despite being nominated 19 times, but the element meitnerium was named after her in 1997.

Students usually enjoy learning facts and figures about the elements. To support student learning, we’ve created a free periodic table puzzle which you can directly download here.

What’s your favorite element? When I ask my students this question, they usually respond with a blank look on their faces. But one of our first projects in class is the “Element Sales Brochure”. Each student chooses an element and must imagine they are working in the advertising department of an element producing chemical company. Sales of their element are below expectations and therefore they must create a tri-fold brochure highlighting the properties and practical uses of their element in order to increase sales. Extra credit is given to students who give their short sales pitch as a presentation in front of class. (In case you were wondering, Molybdenum is my favorite element. I just like to say that word and it is also one of the chemical constituents of the beautiful orange-red mineral wulfenite.)

The periodic table possibilities are endless. After we have taken a deep dive into our study of this amazing resource, I like to review with a quick round of Pin-the-Element-on-the-Periodic-Table. For this fun class activity, I draw a rough sketch of the periodic table on the board and give each student an index card with something written on it. It could be the name of an element, a type of element, one of the properties of a group of elements or some other interesting fact about the periodic table. Then, at the same time, all of the students in class get out of their seats and “pin” their card to the most appropriate location on the periodic table. After they are done and have returned to their seats, we go over the placement of the cards and discuss the results as a whole class.

Looking for more helpful, time saving, ready to use, print and go resources for atomic structure? See our full list of resources for atomic structure here.

The Power of Explanation: More than Just Getting the Right Answer

In high school physics, where much of the work involves manipulating formulas and plugging in the appropriate values, students often focus on just trying to get the right answer. This is driven by their desire to complete their assignments as quickly as possible while achieving high grades. Little thought may go into the meaning behind their answers. While obtaining the right answer is important, the ability to explain how they arrive at that answer is equally, if not more, crucial.

Without the ability to explain their answers, students can fall into the trap of rote memorization. They learn how to use formulas without understanding how they are applied and and what is behind their answers. Requiring students to provide an explanation helps them to develop a bridge between knowing and understanding, ensuring that students are not just passively absorbing information but are actively engaging with the concepts.

Newton’s laws of motion offer a variety of opportunities for students to develop the problem solving skills needed to analyze an object’s motion based on the forces acting on it. But simply plugging numbers into a formula to calculate an object’s acceleration is not enough. Students must understand and be able to explain why an object experiences a particular type of motion. 

Shown above are two free body diagrams. Using Newton’s laws of motion my students must be able to describe the motion of each object and provide an explanation of how they arrived at their answer. Possible questions include: (1) which object could be at rest?, (2) if object A is moving to the right is it speeding up, slowing down or moving at a constant velocity? and (3) if object B is moving to the left is it speeding up, slowing down or moving at a constant velocity? As you can see the magnitude and type of each force is not given, so no calculations are allowed. 

Instead, students must focus on their knowledge of balanced and unbalanced forces and the motion that results in each of the three situations described above. The forces acting on diagram A are unbalanced and the net force is to the right. Therefore, it must be accelerating and if it is moving to the right then it is speeding up because the net force also acts in this direction. The forces acting on diagram B are balanced; the net force is zero newtons. Therefore, it could be at rest. But if it is moving to the left (or in any direction for that matter) then it must be moving with a constant velocity. 

This practice of explaining their answers encourages students to question assumptions, analyze the content of a problem, and think logically through each step of their solution. These are the hallmarks of critical thinking, a skill that is essential not only in science but in decision-making processes throughout life.

Why I Did It: Or How I Taught Myself How to Teach

Many years ago, too many to count, I started a YouTube channel, Step by Step Science. More than 550 videos and 200K plus subscribers later, I still remember the impulse for starting the whole thing….

Although at some point I had probably learned about the workings of concave and convex lenses and mirrors, it was coming to the time of year when I had to teach the subject to my 9th grade physical science students. And I did not know where to start. So now I had to learn it all again, and to be able to teach it I had to put it all together in an easy to understand set of lessons. That’s what we do as teachers, learn something so that we can teach it to others.

After looking through various texts I had lying around and searching the internet for the most useful explanations, I came across what is now one of my favorite online resources: The Physics Classroom.

As I clicked through their very thorough pages of explanations for convex and concave lenses and mirrors, including the discussions of object and image locations, real and virtual images, image orientation and magnification, I became increasingly frustrated about how I was going to be able to put this all together into a logical, understandable sequence of lessons for my students.

In an attempt to establish a logical framework in my own head, I put pencil to paper practicing all the possible permutations of lens and mirror ray diagrams for each of the possible object locations (there are a total of twelve). It seemed a little overwhelming until I realized that you really only need to remember two things: parallel – F and F – parallel. Well, maybe this is a bit of an over simplification but it is a great place to start.

As I show my students, for every object location, to locate the image you only need to draw two rays and the two rays are drawn the same way regardless of the object location or optical device. The first ray is drawn so that it enters the lens parallel to the principal axis and is refracted so that it exits the lens through F (the focal point). The second ray is drawn so that it enters the lens through F and is refracted so that it exits the lens parallel to the principal axis. The image is located at the point of intersection of these two rays. Of course mirrors reflect rather than refract, but the answers are the same as those for a lens.

Ray Diagram for Convex Lens

As is the case with so much of teaching basic physics concepts, you have to look for the patterns. Patterns that make everything fit together into a logical sequence of lessons that start at point A lead your students to higher order thinking.

So now that I had figured out how to teach concave and convex lenses and mirrors, I wanted to show as many students as possible that they too could figure it out. That’s where the idea for the YouTube channel came from. A desire to show others that many of these topics are not really that complicated and that if broken down into an easy to understand set of steps they too can have success in their math and science classes.

My 4 part video series on ray diagrams has turned out to be quite popular, as you can see from the first video in the series which has more than 1 million views. For further learning, here’s a link to all my optics videos: Optics: Ray Diagrams, Reflection, Refraction, Thin Lens Equation

Global Connections at the ASE Conference

Instead of going straight back to teaching after the holidays, I kicked off the New Year with two presentations at the United Kingdom’s Association for Science Education (ASE) annual conference. The ASE conference is Europe’s largest event for science educators, attracting participants from all over Europe and beyond. Held at the University of Northampton, the conference was a good opportunity to share resources and ideas that I’ve developed over my twenty year teaching career.

My first talk, Using PhET Online Simulations for Student-Centered Learning, focused on how to combine the University of Colorado’s popular physics and chemistry online simulations with inquiry-based labs and follow-up resources to put students at the center of the learning experience. It was inspiring to see how many of the teachers in attendance also use PhET simulations to motivate and engage their students. In preparing for this talk, I was impressed by the amount of research which documents the impact of PhET simulations on student engagement and academic achievement. Online simulations do not replace traditional lab experiments, but they do provide students the opportunity to visualize physical concepts that cannot always be demonstrated in the classroom.

For my second presentation I shared my experiences teaching eighth grade physics in a paperless classroom. Tired of printing so many assignments and losing so much class time passing out and collecting papers, the students and I switched to using the Goodnotes app on our tablets for all our work. This low cost app lets students take handwritten notes in digital notebooks and annotate imported PDF documents such as handouts, worksheets and photos. Students share their notebooks with me so that I can monitor their progress and grade their assignments right in the app.

Now I use my tablet to organize the documents for all of my classes and as a digital whiteboard during lessons. This frees me from always having to stand at the front of the class to write on the whiteboard. I can move about the classroom, check on how my students are doing and anything that I want to point out or write on my tablet will be projected at the front of the room. I’ve also got fewer stacks of student papers piled on my desk!

Connecting with teachers from around Europe at the ASE conference was just the boost I needed before returning to the classroom after the holidays. I hope to do more presentations on using digital lab activities to engage and motivate physics students in the coming year.

Where’s Your Next Science Field Trip?

Back-to-school means thinking about time spent both inside and outside of the classroom with your students. What field trips will best bring science to life for those easily distracted kids with short attention spans? Will all the time and energy that goes into planning these excursions pay off in terms of an enriching and engaging experience for your students?

One of my favorite high school science excursions is to the DLR School Lab at the German Aerospace Center (Deutsche Zentrum für Luft- und Raumfahrt) in Berlin or, as my students like to call it, the German NASA. Students from grades 7 – 12 get to learn about planetary research, optical information systems, transportation research and much more.

The DLR School Lab offers close to twenty lab experiences for students and teachers to choose from. Last year we chose the Heat vs Temperature, Name that Asteroid and Floating Car Data labs. In each lab students collect or are given a set of data they must use to answers question or solve a problem. The hour long lab sessions are run by graduate students from the Technical University of Berlin (TU Berlin). My students find these grad students relatable so the sessions are relaxed, engaging and fun. No stuffy college professors necessary. 

Over the course of our day at the DLR School Lab, students first designed an experiment to identify a series of unknown liquids in the Heat vs Temperature lab. They were given high intensity light sources, concave mirrors, electronic sensors and three to four liquid samples. Students learned to detect observable differences between the liquids and how the lab equipment could be used to collect the data needed to identify the liquids based on their thermal properties. The grad students expertly facilitated student understanding.

In Name that Asteroid, students learned all about the uncertainty in scientific classification. They were given information that is used to identify different types of meteorites and thin sections of samples taken from actual meteorites. Using sophisticated microscopes with different light sources and filters to identify the internal structure and minerals present, each group had to classify the meteorite and present their decision. Through the questions posed by the other groups, students quickly saw that there can be differing opinions about their decisions.

Courtesy of DLR School Lab

When driving through a city, we all want to know the fastest way to get from point A to point B. In the Floating Car Data lab, students play a board game to see how the DLR is developing a computer model using GPS data from taxis to make traffic flow more efficiently. Although this was the lowest tech experience of the day, students still had fun answering traffic questions and using the available GPS data to see who could get across town the fastest.

Whether it’s the beginning, middle or end of the school year, providing science students with real-life experiences outside the classroom helps to enliven their studies. Returning to the classroom and relating those experiences to your course material is a great way to tie it all together. Students may see field trips as a free day outside of the classroom, but teachers can help ensure that they come away with new knowledge that they could not have gained from their school books.

ChatGPT and Science Education

Me: Does ChatGPT enhance or undermine science education?

ChatGPT: I can be a helpful tool for science education, as I can provide accurate and relevant information on a wide range of scientific topics. However, it’s important to note that science education is not just about acquiring information; it’s also about developing critical thinking skills and learning how to evaluate and analyze scientific claims. In that sense, relying solely on an AI language model like myself may undermine science education if it leads to a lack of engagement with the material and a reduced emphasis on critical thinking. Therefore, while I can be a useful resource for science education, I should not be seen as a replacement for human teachers, mentors, and educational resources.

In my 9th grade physics class we’ve been exploring the pros and cons of using AI tools to learn physics. Students were excited to try out ChatGPT on some of the problems we were working on in class. Chat GPT was able to solve basic kinematics problems, but sometimes gave the wrong answer when given slightly more challenging problems. The example below demonstrates the risks of relying on ChatGPT to do your homework.

Problem: A baseball player can throw the ball straight up into the air with a speed of 134 kilometres per hour. What is the total time that the ball will be in the air?

Oops: ChatGPT started out on the right track and knew the basic steps to solve the problem, but still ended up with the wrong answer. Read on to find out where ChatGPT went wrong.

ChatGPT was able to correctly identify the given value for the initial velocity and recognised that it must first be converted from km/h to m/s. It then chose the correct equation of motion to solve the problem and even identified the important fact that the final velocity will be zero meters per second.

But this is where ChatGPT starts to go wrong. The ball really has “two” final velocities: 0 m/s at the ball’s maximum height and -37.22 m/s when the ball returns to its initial position. ChatGPT chose the former velocity but then forgot an important last step. The problem asks for the total time in the air, which includes the time for the ball to reach its maximum height and then return to its initial position. In choosing 0 m/s as the final velocity ChatGPT only calculated the time for the ball to reach its maximum height.

To get the total time in the air, ChatGPT’s answer of 3.8 seconds must be multiplied by two to include the time for the ball to come back down to its initial position. ChatGPT overlooked this basic step in calculating a solution since the problem clearly asked for the total time the ball was in the air.

What a relief! AI is not yet ready to replace me as a secondary science educator. As a sentient being with good critical thinking skills, I can play an important role in helping my students understand the beneficial uses and pitfalls of tools like ChatGPT. AI also cannot replace me as a mentor to students who need help meeting their personal and academic challenges.

Lasagne or Spaghetti? The Pasta Cantilever Challenge

Introducing engineering concepts into the high school physics classroom can help students grasp the relevance of scientific knowledge to the real world. I love to do this through project-based assignments in which students have to apply their knowledge through design-based activities. And what better way to keep students engaged and on their toes than to include a challenge for the best design!

Which cantilever will support the required weight at the maximum distance from the table?

An excellent resource for design-based teaching is NSTA’s Beyond the Egg Drop: Infusing Engineering into High School Physics. This is where I found the idea for my students to design and build cantilevers with pasta. All the activities in this book present students with an engineering design challenge while reinforcing physics concepts. The pasta cantilever challenge fits well with lessons on forces and equilibrium.

The challenge for this activity is for students to design and build a pasta cantilever that supports the weight at the greatest distance from the edge of the table. To incorporate the design engineering process, we do this activity over two class periods. During the first class, students build a prototype that they can test and evaluate to see what factors affect the cantilever’s ability to support the required mass at the greatest distance from the table. This allows them to see what other groups have done. Then, during the second class they are ready to build their final cantilever and see who wins the design challenge.

Students and teachers love this design challenge because it is fun, incorporates active hands-on learning, is easy to set up and allows students to compete against each other while learning. All you need for the pasta cantilever challenge is pasta, string, paper, tape and a 50 gram mass.

We’ve developed a resource for this activity that is now available in our TPT store. The lab activity includes goals and instructions, sample grading criteria, and a set of pre- and post-lab questions. We hope you and your students enjoy the Pasta Cantilever Challenge!

The Mu of the Shoe

Going out to a holiday party? You will probably want to wear your fanciest shoes. Getting ready for a basketball game? To show off your best moves you’ll need to have a lot of friction out on the court. But which shoes will serve you best? To answer this question, you need to know….“the mu of the shoe”!

Once students have learned about Newton’s laws of motion and the different forces that affect the motion of objects, we spend extra time on the force of friction because it has so many applications to our daily lives. Friction is the force that allows us to move through our environment, change direction, and carry objects. But for a full understanding of the friction force, students also need to learn about the coefficient of friction, a measure of the amount of friction between two surfaces.

Students can easily determine the coefficient of friction in the classroom using their own shoes and a spring scale. If you’d like to try this with your students, our Mu of the Shoe Friction Lab is a guided activity in which students work in groups to determine the coefficient of friction between their shoes and the floor. Students first look at all the shoes in their group and make predictions about which shoe will have the greatest coefficient of friction. Next, they measure the weight of their shoe, and then they pull it across the floor at a constant velocity to measure the force of friction on the shoe. This fun activity gives students experience with collecting data, performing calculations, and exploring the relationship between the weight of the shoe, the friction force, and the coefficient of friction.

The Shoe Friction Lab is the latest resource available in our TPT store. Students will enjoy debating which shoes they think have the highest coefficient of friction and then testing their predictions. Check out my introductory video on the force of friction for a helpful supplement to student learning about this topic.

Design a site like this with WordPress.com
Get started